


uPVC Sliding Sash Windows Installation Guide
Share this story!
Share this post to any popular social media, email it to a friend or print it off.
Index
- Introduction
- Tools & Equipment
- Step 1- Measuring Up
- Step 2- Window Removal
- Step 3- Installation
- Step 4- Fixing the Frame
- Downloadable PDF Guide
Introduction
This guide will show you step-by-step how to install uPVC Sliding Sash Windows. If you have not yet bought your windows, you may also first want to review our window and door buying guides. Additionally, you can find out more about what building regulations affect window and door installations.
The installation of any window is a complex job that most people without some experience in building and joinery may have difficulty doing, so shouldn’t be taken lightly. If you’re looking to have Quickslide’s vertical sliders installed, we recommend using our Find an Installer tool.

Approximate completion time per window: 1-2 hours for a new build and 2-3 hours to remove an existing window and replace it with a new one.
Tools & Equipment
You will require the following tools and equipment before beginning:
- Tape measure
- Level
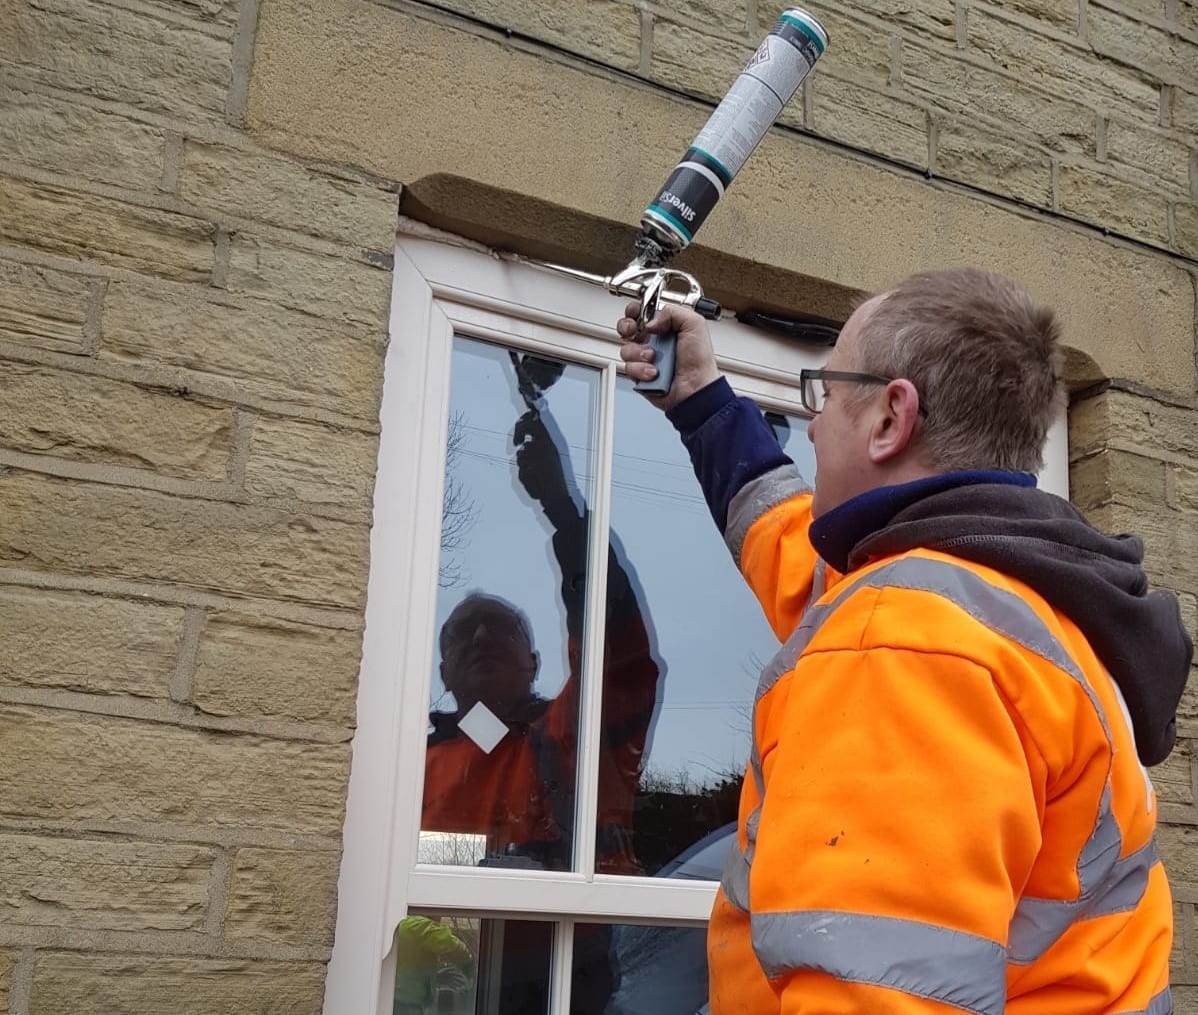
- Silicone gun with silicone to match the external frame finish
- Foam gun
- Fixing screws
- Screwdriver (cordless if possible)
- Hammer
- Chisel
- Hand saw or electric saw
- PPE equipment, such as safety glasses
Step 1- Measuring Up
You will first need to measure the opening in the brickwork to ensure the windows you have bought will fit. There are two main ways in which the windows will be originally installed: brick-to-brick or check-reveals. Both methods are explained in more detail below.
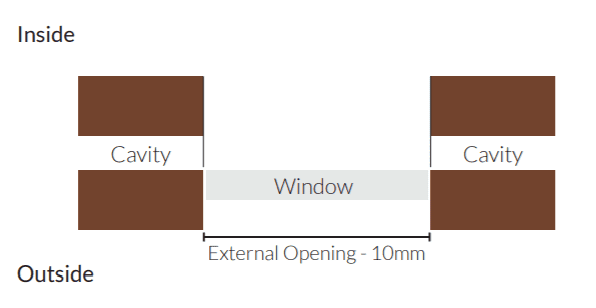
Brick to Brick
You will see about 20-40mm of visible brick showing on the outside.
How to measure?
Measure between the external brickwork opening and deduct 10mm both in width and height
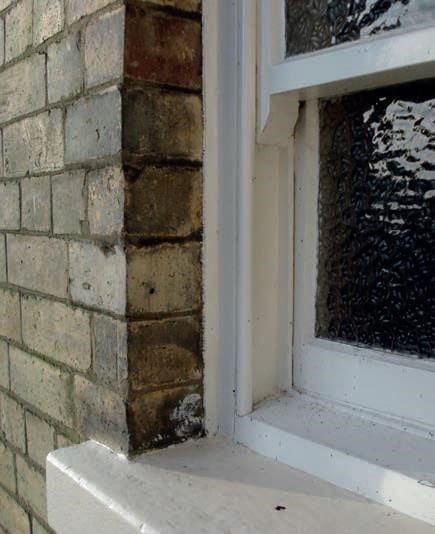
Check Reveal
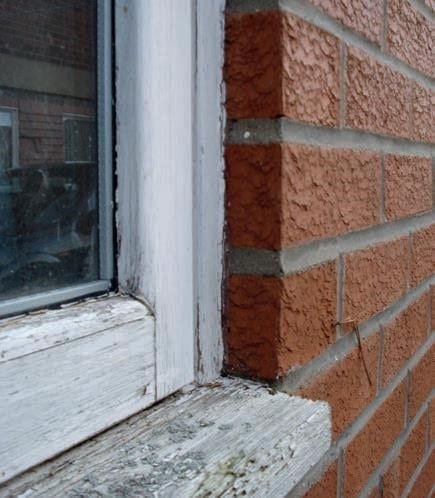
The full width of the brick is visible on the outside.
How to measure?
Measure between the external brickwork opening and add 40mm to the width and 20mm* to the height with an equal 20mm* sitting behind the brick. (*Providing there is sufficient clearance to do so.)
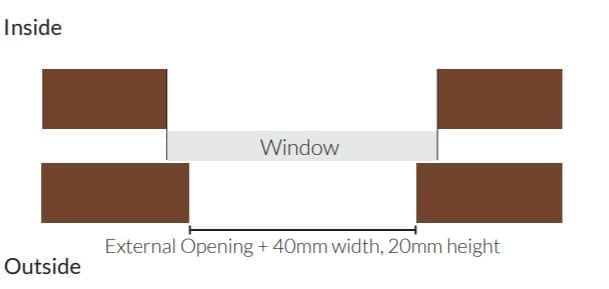
Important – Check that the internal width and height are larger than the external.
Step 2- Window Removal
Please read the following steps carefully before attempting to remove any existing windows.
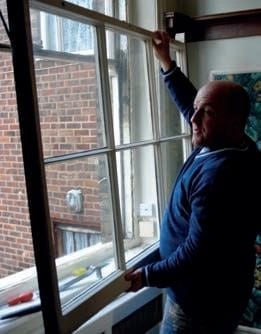
2.1
Cut the sash cords to the bottom sash, and prise off the internal staff bead – this enables you to remove the bottom sash.
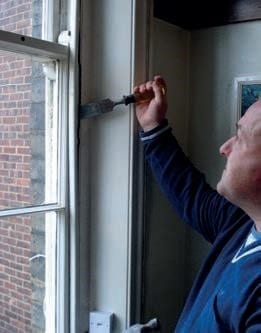
2.2
Cut the sash cords to the top sash, and prise off the centre parting bead. The top sash can then be removed.
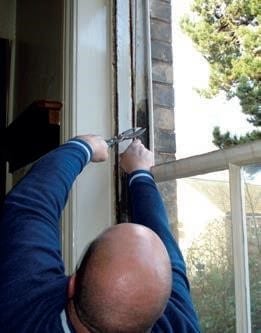

2.3
Remove the old sash weight as shown.
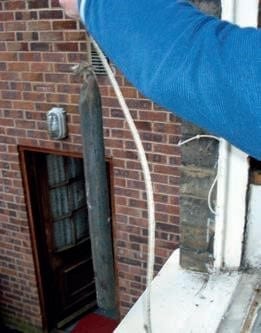
2.4
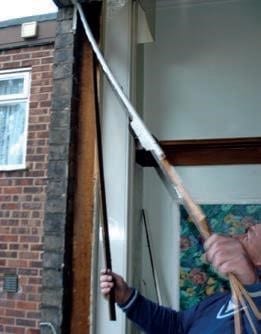
Cut the old box near where you’ve removed the weights, taking care not to cut or damage any cables that may go through the window.
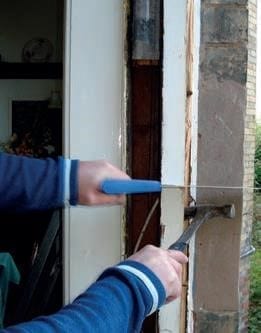
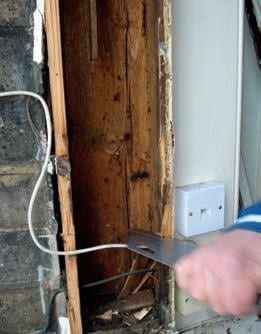
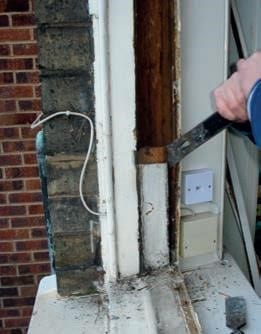
2.5
Once you’ve cut through the box, prise out sides trying not to cause damage to bricks, then remove the head rail and cill.

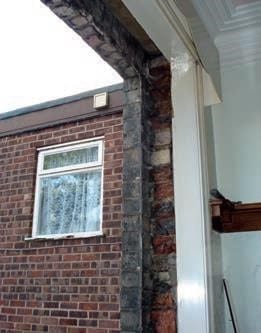
2.6
Once all the old wooden boxes have been removed, clean off any old cement or sealant that was around the old windows.
Step 3- Installation
The procedures in 8S8213-4 Code of Practice for the survey and installation of windows and external door sets, or any subsequent updates following this manual, should be followed.
3.1 Fit the frame into the opening
The frame should be placed into the opening and bedded on a suitable compound; it should be packed under the cill, ensuring that it is level, and not bowed. The frame should then be wedged temporarily to hold it in position. Adjust the wedging until the frame is standing vertically, and the jambs are plumb and true from side to side.
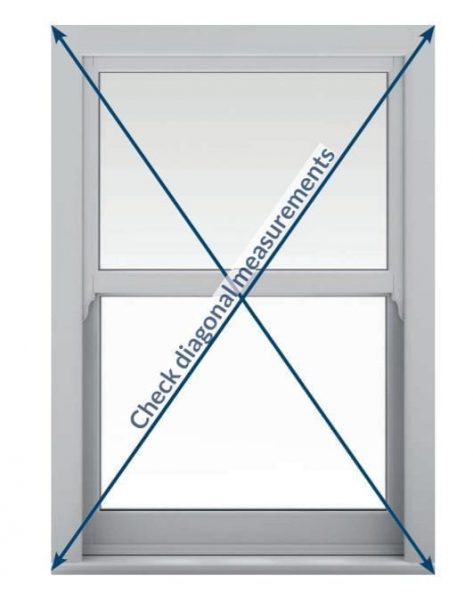
3.2 Check the diagonal measurements of the frame.
3.3 The Frame
Wedge the frame temporarily in the opening ensuring jambs are plum and square.
3.4 The Cill
The cill must be level along the opening width and embedded on a suitable compound.
Step 4- Fixing the Frame
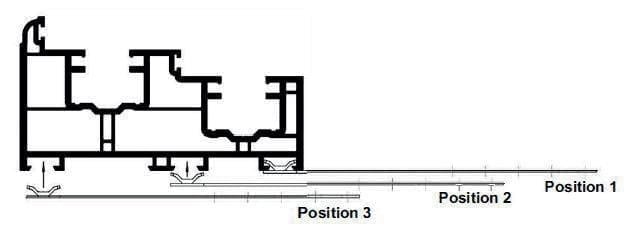
The outer frame can be fixed through three positions. Fixing should be between 150mm and 250mm from the corners with maximum centres of 600mm.
Before final tightening, the frame should be packed at screw positions with shims. To ensure optimum weather performance and correct operation of the sashes, the outer frame must not be bowed. Ensure the gap between the sashes and the outer frame is uniform. Check the diagonal measurements of the frame.
Foam fixing should only be used as a gap filler and not as an alternative to mechanical fixings. After applying check that the outer frame has not distorted or bowed. Packing pieces can be placed between the frame and the sashes, or a brace can be put across the frame to prevent bowing.
After installation, debris or contaminants should be removed, and any drainage paths cleared. Protective tapes should be removed as soon as practical, as the ageing of tapes can cause difficulties in removal.

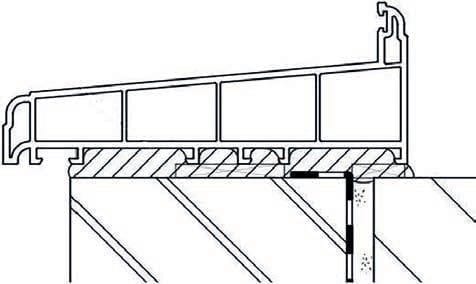
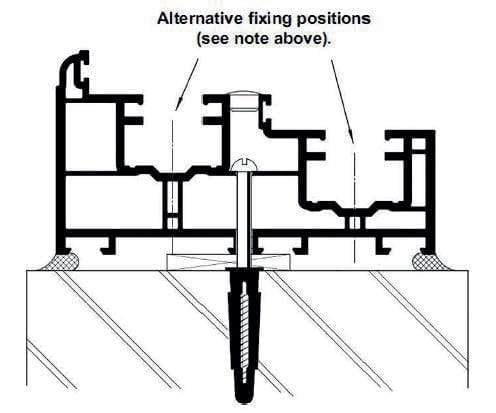
4.1 Fixing Position
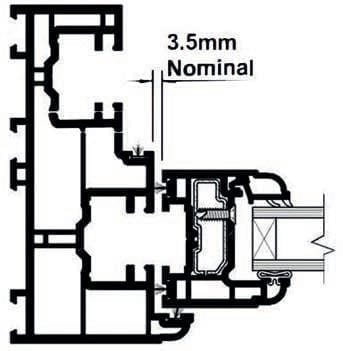
As well as the method shown below, frames can also be fixed through the balance channels, but care must be taken not to distort the chamber when tightening the screws. To position a fixing in the top half of the window, it will be necessary to remove the balances.
Extreme care should be taken when removing sashes or balances, as they will be under tension, and the sash weight will not be supported. (Refer to the balance manufacturer’s instructions before removing balances).

4.2 Fixing Lug
There is a 150mm fixing lug (AL01) available. This will twist fix to the outer frame in three different positions to give a choice of fixing hole positions in the protruding part of the lug. Fixing lug spacing should be done through frame fixings.
If using fixing lugs, it is important to ensure that the outer frame members are straight & that the window operates correctly. Fixing may be required, in addition to fixing lugs, to maintain a satisfactory fix for the window.
4.3 Frame Packers
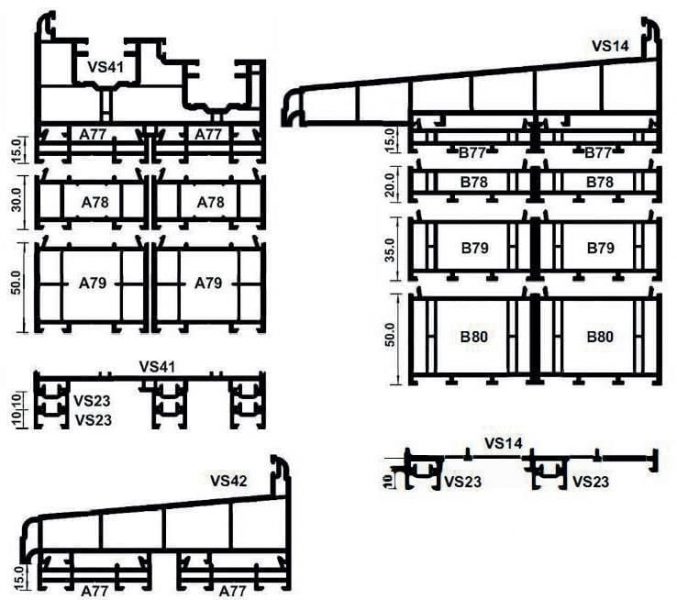
As an aid to accommodating different installation and building details, there are a range of frame packers available. For the outer frame (VS41) and the 150mm Cill (VS42), there are three 63mm wide frame packers and a 19mm wide odd leg add-on.
The frame packers are available in 15mm, 30mm and 50mm heights. They can be used in pairs (as shown below) or individually, depending on the building details. They can be clipped into themselves to achieve alternative sizes.
The odd leg add-on is 10mm high and can again be used individually or in combinations. It also clips into itself to accommodate different size requirements.
The 210mm cill (VS14) has a different range of frame packers. These are 70mm wide and are available in 15mm, 20mm, 35mm and 50mm heights. These can also be clipped into themselves to achieve alternative sizes. The same 10mm odd leg add-on is also suitable for use with this cill.
Further Questions
What Are Sash Windows?
Sash windows are a popular window style that has been around for centuries in the UK. They are made of two sashes that slide vertically, and because of this, they are sometimes referred to as vertical sliders. There are a number of different styles available, including Edwardian, Georgian, and Victorian.
At Quickslide, our legacy uPVC sash windows can come in almost any conceivable colour, and we have a wide selection of optional authenticity features to choose from. Learn more about the features of our uPVC sash windows on our website.
How Do Sash Windows Work?
A sash window is made of two sashes that slide vertically up and down. Typically, these sashes are of equal size, but they can be different. Modern and advanced sash windows like Quickslide’s are capable of tilting and sliding.
Each sash has a mechanism to counterbalance the other sash, eliminating the need for sash weights, cords, or pulleys found on traditional sash windows. Quickslide’s balances are hidden within the two chambers on either side of the sash window. Quickslide sash windows use a constant force balance system alongside a spring balance system for consistent and reliable results. Learn how to replace a constant force balance system.
Thanks to our tilt and slide facility and high-quality uPVC frames, our uPVC sash windows are incredibly easy to clean compared to older timber models. All it takes is an occasional wipe down using a sponge and soapy water to remove any build-up of dirt or dust. Each of our colours and wood grains is designed to be robust and withstand British weather conditions, allowing our windows to look their best with only minimal effort for years to come.

You May Also Be Interested In:
- Ultimate Guide to Sliding Sash Windows
- 5 Sliding Sash Window Benefits
- Sliding Sash Windows For New Builds
- What are 4 Advantages of Sash Windows?
- How Much Do Sash Windows Cost?

Sandra’s comprehensive understanding of sash windows, flush windows, bifold doors and more encompasses everything from initial manufacturing to after-sales support. As a trusted member of the Quickslide team, her authority helps trade partners, homeowners, and industry peers alike.
As one of Quickslide’s most prolific writers, Sandra contributes regularly to the industry with useful insights into the newest innovations in modern sash windows. Her passion for the product shines through in her articles, and her pieces are suitable for technical professionals and homeowners thanks to her digestible, simple breakdowns of complex manufacturing terms.
Each of Sandra’s articles is written using the latest research and industry developments, ensuring that readers receive reliable, up-to-date information as and when they’re published. As a marketing visionary, our clients and their customers can rely on Sandra’s insight for the latest in vertical sliders and other double glazed Quickslide products.
Please note, our news articles are relevant and accurate at the time of release, but as technical developments dictate, and times goes by the information in this article may no longer be applicable. If you have questions, please contact us using our online contact form or call us on 03332 412 240.