How To Install A Bay Window
Share this story!
Share this post to any popular social media, email it to a friend or print it off.
This handy guide will tell you how to install bay windows. Installation is a complex job, and it can be a tricky process depending on the project. We have put together this guide to help you with the installation process as much as we can.

The installation time varies depending on the building you are working on. It may take between 1-2 hours per window for a new build, and 2-4 hours per window for a replacement project. Bear in mind, a bay window will always consist of more than one window.
This guide will talk about bay poles, frame adaptors and covers; features itemised on the following illustration:

Equipment Needed
Before you start to install a bay window, you will need to ensure that you have all the correct equipment and the following PPE:
- Cut Resistant Gloves
- Steel Toe Footwear
- Tape measure
- Level
- Silicone gun with silicone to match the external frame
- Foam gun
- Fixing screws
- Hammer
- Screwdriver
- Chisel
- Hand or electric saw

Installation Process
Step 1 – Assessment and Measuring
When you complete the initial survey to detail the new window specification, it is vital that you first check that there are no concerns such as cracks in the brick wall before you proceed. At this point, the measurements should be taken for Quickslide to supply a bay window solution that fits the aperture.
You need to measure the internal widths of each section of the bay window by measuring the existing windows point to point. We also require the internal angle. It’s essential that you provide us with the internal dimensions. Please fill out the bay windows measurement form and submit to sales@quickslide.co.uk and we’ll be happy to advise whether more information is needed. Please be aware that you should attempt to measure the smallest measurements possible, as these will be the “tight” sizes. This will allow tolerances that give space for expansion and contraction of the bay window frames.
Step 2 – Remove Existing Windows
Before removing any windows, assess the structure to see if any load baring equipment is needed.

It’s also best practice to double-check that your new windows are the correct sizes before removing the old windows.
Make sure all old windows are removed and leave as smooth an opening as possible – this will make fitting new windows a lot easier.
Step 3 – Measure The Sill
Once the old windows have been removed and the aperture is ready for the new windows to be installed, the first thing you should do is measure the angles for the sill. Bay posts come in two different variants: 90-degree and variable. With any variable degree bay post, you should measure the angles for the sill. This guide will cover the complexity of a variable degree bay. It’s vital that you make sure you are completely confident the angle is correct before cutting the sills on the windows.


Make sure you allow around 9mm for the bay posts, this measurement may change due to the angle of your bay, always measure before cutting the sill. Also, make sure to measure all corners of the bay just in case the angles are different.
Step 4 – Cut The Sill
Some installers remove one or both sashes to make the window lighter and easier to install. Before you can install the new windows, you need to place the window on its head, remove the sill, cut the angle of your bay and then re-attach the sill.

If your window has been supplied with a temporary cill, you’ll need to follow these steps to fit it onto a flagged cill.
- Remove the Temporary Cill – Carefully take off the temporary cill from all windows that will be fitted to the flag, ensuring you retain the screws.
- Apply Silicone Sealant – Apply silicone sealant to the bottom of both frame jambs as shown in the image below. Make sure all areas highlighted in yellow are fully covered.
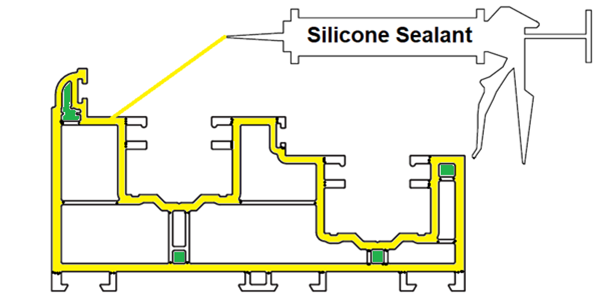
- Position the Flagged Cill – Insert the screws through the flagged cill, aligning them with the green-marked areas in the frame. Make sure to hand-tighten them at this stage.
- Secure the Cill – Once all screws are correctly aligned, fully tighten them to secure the cill to the frame.
- Final Touches – Wipe away any excess silicone for a clean finish.
Step 5 – Frame Adaptors
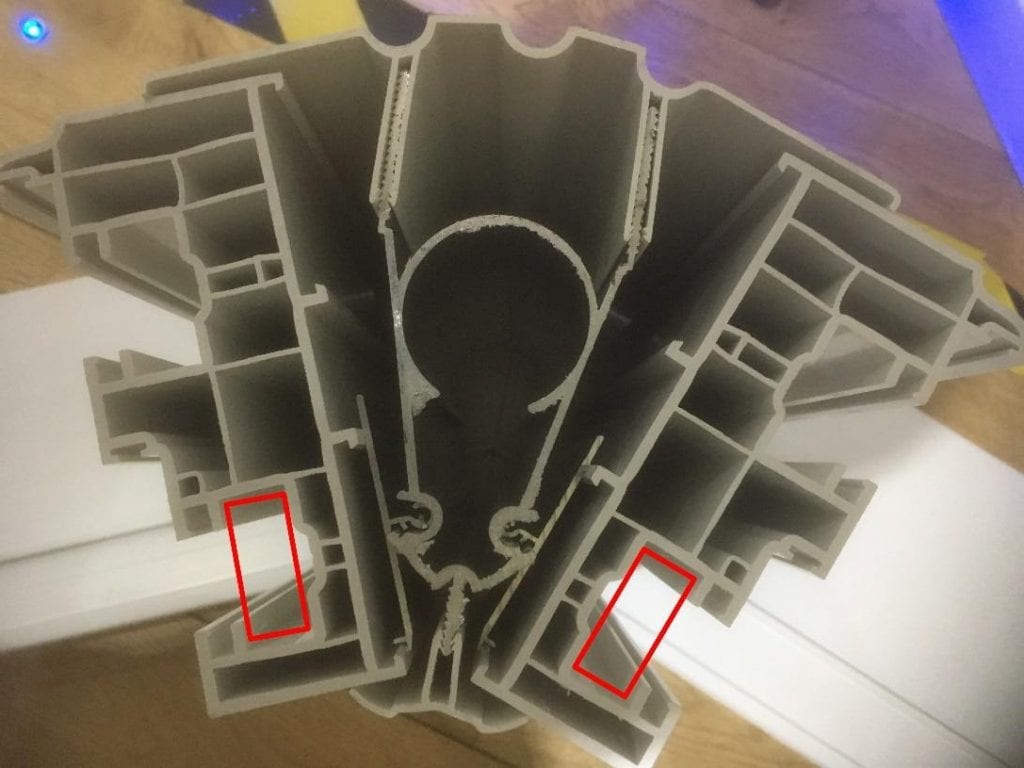
Now that you have cut the sills to the right angles you are almost ready to start the installation. Before placing the windows into the bay, you should fit frame adaptors to both external sides of the middle bay. Use 25mm self-tapper screws, one screw at the top and one at the bottom then 500mm apart. Visually inspect the positioning of the frame adaptors; you should make sure the adaptor is touching the outer frame where the lip is on the frame adaptor. If it is not touching, then the bay poles will not sit correctly later.


Take extra care when screwing the adaptor to the frame. Make sure that the screws don’t penetrate into the sash chamber (illustrated in red) as this can affect the function of the window.
Step 6 – Place Windows In Position
Start the installation process by placing the middle bay into position. Make sure to include packers under the outer frame. Throughout the installation process you should make sure that the window is level, especially before fixing the window.

Remove the sash stops at the top and place two fixing screws to hold the window in place.

Repeat this process for the side windows also known as the returns. Again, make sure to include packers. Frame adaptors are not yet needed for the side windows.

Step 7 – Level Windows
Once all windows are in position, start with your highest point and use packers or 35mm architrave to pack the other windows to make all the windows level.

You may need to unscrew the fixing screws to level the windows – it goes without saying that you will want to make sure someone is holding the window if you need to remove the fixing screws.
Step 8 – Bay Poles
Once you have checked that the windows are level, attach the frame adaptor to the bay pole (make sure it is the opposite side to the frame adaptor that you have attached to the outer frame).


Make sure the ball and socket joint on the aluminium are in correctly. Do not put any fixing screws into the bay until you have checked the internal side. Before fixing any screws make sure the bay pole is in the centre all the way down the bay. Also, make sure the frame adaptor is touching the inside lip of the outer frame. Once you are happy the bay pole and the frame adaptor are level, fix screws (45mm self-tappers) into the aluminium bay pole, one at the top and one at the bottom then 500mm apart, fixing into the centre of the reinforcing on the window.
Make sure to check the inside after fixing to see if the bay pole has moved.
Step 9 – Final Fixing Screws
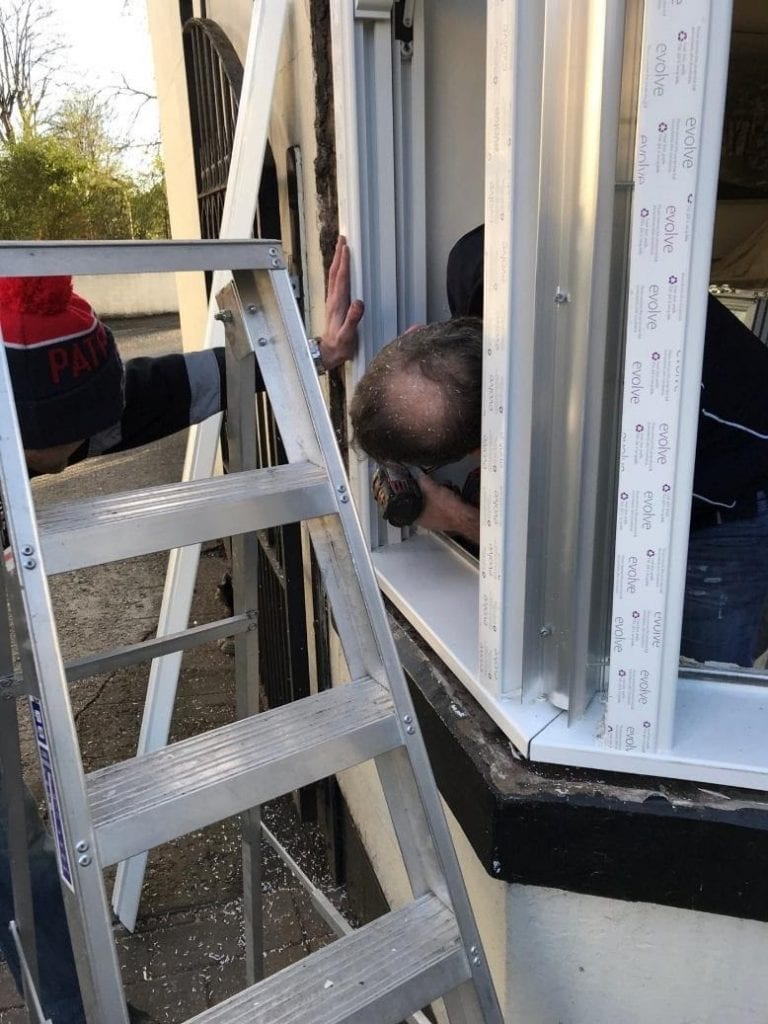
Once all windows and bay poles are in make sure to check that all windows are level. Remove the sash stop at the bottom and place a fixing screw and fix final fixing screws in the top of the window. Also put fixing screws through the sill, make sure that the bay pole covers cover the screws.

Step 10 – Re-install The Sashes
If you removed the sashes before beginning the installation, the frames are now in position for the sashes to be re-installed. Make sure that they are level and that each window is fitted perfectly. We advise checking that the windows operate smoothly and correctly.

Step 11 – Finishing Touches
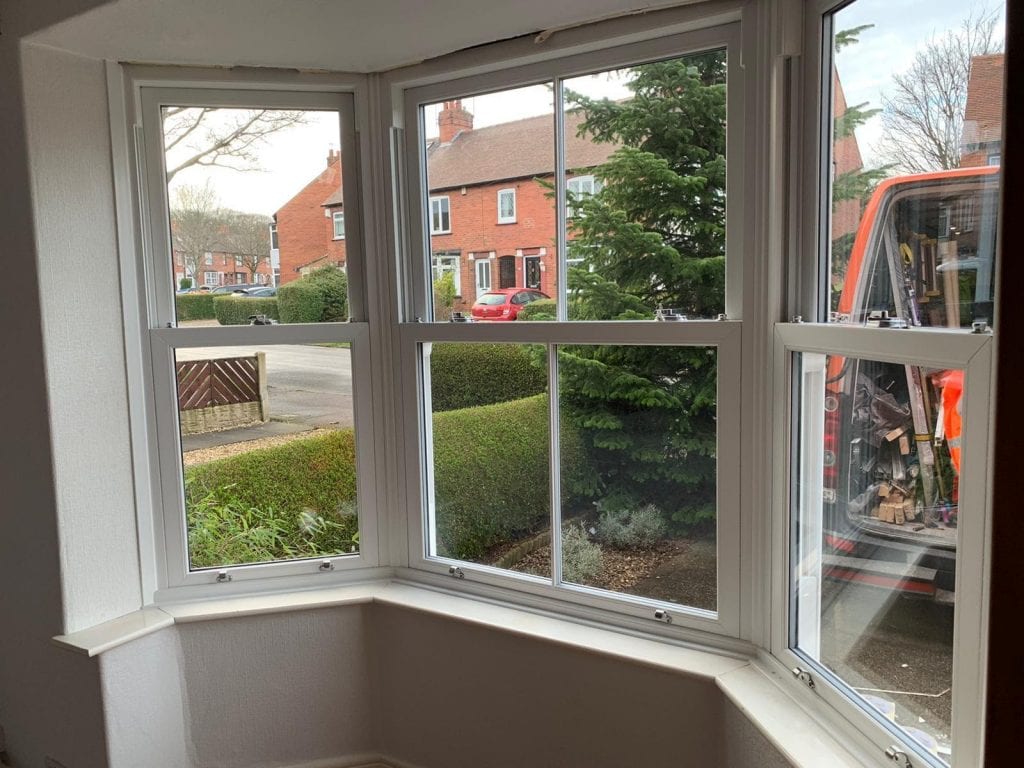
There are a few things that you will need to do before the installation of your new bay windows is complete. Firstly, put the internal and external trim on the bay poles and tidy around the window making sure there are no gaps. Then make sure to fix all additional furniture on the window such as pole eyes or D handles if requested. Before leaving the property, we advise one last time to check that the bay windows are operating correctly.
Our Services
If you prefer to organise your own bay window survey and installation, we are more than happy to provide a supply-only service. We have handy installation guides available for both our windows and doors. Our delivery service is nationwide so that you can buy your new windows and doors from almost anywhere in the UK.
For property owners wanting the full service, we can also provide a supply and install service through our range of stockists and installers. We work with professional tradespeople, including FENSA approved installers, to provide you with high-quality bay windows that can enhance any property.
If you have any questions about our range of bay windows and their installation, please contact our team. You can send us a message on our online contact form, and we will get back to you as soon as possible. Alternatively, you can give us a call on 03332 412 240 and chat with our experts. We look forward to hearing from you.
Further Questions
What Is A Bay Window?
A bay window is a style of window that protrudes outwards from a wall, and it typically consists of three glass panels. By projecting outwards, they can provide additional space to the internal area of a home by creating a bay or alcove. Our legacy sash windows can be incorporated into a bay window.
A bay window may be polygonal or rectangular, and if it is arced, then it is typically referred to as a bow window.
How Much Does A Bay Window Cost?
Bay Window costs change depending on the size, shape, material, number of windows, and much more. The best way to determine the cost of a bay window is to request a price on our website today!
How To Dress A Bay Window?
There are plenty of excellent ways to dress a bay window; curtains or blinds can make a beautiful addition, as well as pillows, chairs, or any ornaments for the cill. One of the main advantages of installing one of our bay windows in a home is the additional space that it offers for decorating and storage.
The customisation doesn’t stop with just the window design, making bay windows a popular choice for many homeowners.

You May Also Be Interested In:
- Choose Sash Windows To Keep The Heat At Bay
- What’s The Difference Between a Bay and a Bow Window?
- Top Trending Window Styles
- Which Windows Are Ideal For Cottage-Style Homes?
- What 5 Sash Window Styles Are Available With Quickslide?
- Bifold Door Maintenance Made Easy – Follow These Simple Steps - 18 November 2024
- Bifold Doors vs. Slide and Stack Doors: Which Is Right for You? - 8 July 2024
- Quickslide Customer Days Heralded a Resounding Success - 21 June 2024
Please note, our news articles are relevant and accurate at the time of release, but as technical developments dictate, and times goes by the information in this article may no longer be applicable. If you have questions, please contact us using our online contact form or call us on 03332 412 240.


